Planet Buster Charts & Errata
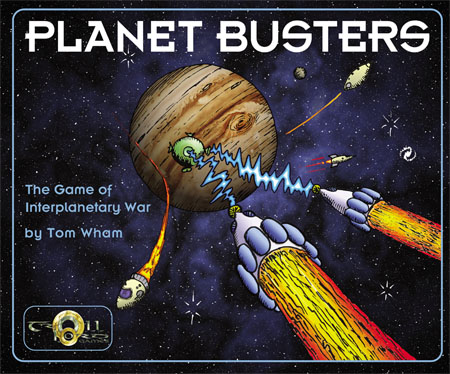 Troll Lord Games Tom Wham On the CoverGame Preparation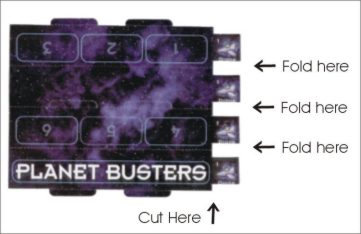 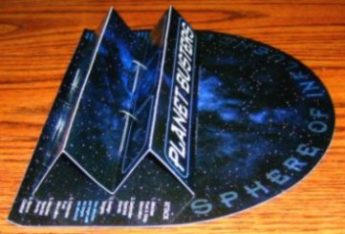 Assembling the Rack: Fan fold the cards from which you cut the drones so that the tabs all point down. The words "PLANET BUSTERS" should face the curved side of the lower "Sphere" card. Once you have inserted the the racks into the Sphere of Influence cards, you will have to fold up the narrow edge (closest to you) so that your tiles won't slide off the back during play. Do this while the rack is assembled. Just a small upward fold will do the trick. You may leave 2 of the racks assembled and still get all the pieces back into the box. If you glue your racks together you're going to have to build a vertical box extension (Dan Matheson does this sort of thing). I also recommend that you use a couple sandwich bags to separate and store the basic and the advanced game parts. Playing the GameThe "safe" Rear Area: There is only a safe rear area for the attacking player. He need only pair up as many ships as he wishes against the ships and satellites around the defender's sphere. Any ship the attacker does not wish to risk in laser combat may lurk in the "rear" out of range of lasers. This is usually done by carriers, tankers, salvage vessels, and the Armed Merchantmen. The rear area is not safe during torpedo combat, because torpedo targets may be chosen from all ships present at the battle. Torpedo Combat: The attacker may fire torpedos at face down defenders. Japanese Language Rules Thanks to Keisuke Oda for this Japanese version of the Planet Buster Rules The formatting is all messed up, but I think the information is still there... oh, and thank's to Alta Vista's Babelfish for helping me confirm that these were actually the rules to Planet Busters and not secret plans for world domination. more errata will appear if necessary... |
PLANET BUSTER PIECES: ExplainedThis chart ©2004 by Tom Wham, James M. Ward, & Troll Lord Games |
|
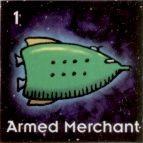
ARMED MERCHANTMEN: (2 - Advanced Game) Large civilian transports coverted to military use. Each one has a Battle Number of 1 and they may participate in combat when you attack (although it's safer to leave them in the rear). The real benefit of an Armed Merchantman is that it provides 4 fuel. To get to another Sphere, of course, it must expend one Fuel to move (but that could come from other sources, like a Planet, or a Fuel Station). On defense the defending player may choose to reveal his Armed Merchanman to provide Fuel for defensive fire (he may do this at any time the Fuel is needed). |
|
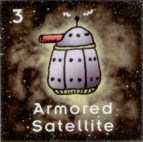
ARMORED SATELLITE: (2) Orbiting laser defense stations. They cannot move to other spheres unless towed by a tug. |
|
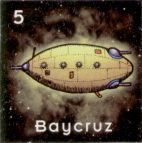
BAYCRUZ: (3) Powerful armored fighting ships armed with laser weapons. |
|
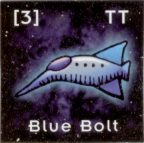
BLUE BOLT: (1 - Advanced Game) High-speed personal yacht, equipped only with two torpedoes. It does not get to fire in laser combat. |
|
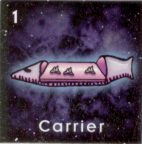
CARRIER: (3 - Advanced Game) Each Carrier houses a swarm of robot fighter Drones. The Carrier itself has a laser combat value of 1. When deployed for battle, the owning player may pay 1 fuel to activate the weapon systems, which allows the Carrier to fire in laser combat AND to create 2 to 5 Drones. On attack, after the defender has had a chance to play Special Events, the attacking player expends one Fuel and rolls a die. Divide that number by two and round up (on a 1 or a 2 you still get two). That is the number of Drones produced by the Carrier. Add these to your attacking fleet. Each drone is a 1 point laser ship that requires no Fuel for the duration of the current battle. The Carrier itself may join the battle and be paired up against a defending ship, but that exposes it to defensive fire. Usually attacking carriers lurk in the "safe" rear area with the tanker or salvage ship. On defense, the defending player may reveal his Carrier(s) just before the attacker begins to pair his ships against the defending pieces. The defending player must pay 1 Fuel to activate a Carrier (just like the attacker) and rolls a die to produce 2 to 5 Drones (see above). Defending Drones may stand alone around the Sphere, or they may be used to screen (see Drones). |
|
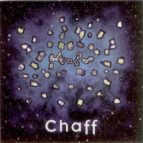
CHAFF: (2 - Advanced Game) Keep this trick in your hand (the rack) until you need it. Playable by the defender... only after all ships have been paired up and just prior to laser combat. Tiny particles of a strange substance are ejected into the combat ara, stopping all Laser Fire for this battle (any fuel spent for that purpose is wasted). Chaff has no effect on Torpedo Fire. Chaff is discarded after use. |
|
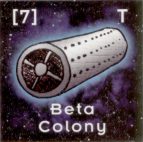
COLONY: (2 - Advanced Game) Columbia [8] and Beta [7] are immense oriting self-sustaining colonies. They are too large to tow to battle and must remain in orbit around the Sphere in which they were placed. Colonies must always be melded face-up around the Sphere. They have no laser defenses but each is armed with two torpedoes. No colony may be attacked by laser until all other ships and satellites in orbit around a defender's Sphere have been paired up. A Planet Buster paired up with a colony, mistakes it for a planet and attempts to destroy it. The Planet Buster is destroyed if it succeds or fails to blow up the colony. Colony Bonus: Each colony that a player has face-up in his Sphere at the BEGINNING of his turn, allows him to draw one extra piece from the deck. EXAMPLE: Joe has both colonies face up in his Sphere. At the start of his turn he would draw his normal 2 pieces plus 2 more (one for each colony). |
|
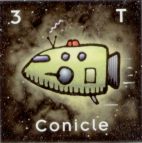
CONICLE: (6) Fast, lightly armored fighting ships armed with laser weapons and a torpedo launcher. |

|
DEATHON: (2) The heaviest class of armored fighting ships. |
|
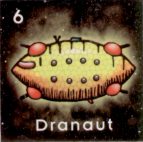
DRANAUT: (3) Armored fighting ships armed with plenty of laser weapons. |

|
DRONE: (16 - Advanced Game) Robotic fighters created by Carriers (see Carrier). Once created, they require no Fuel for the rest of the current battle. The Drones are not part of the deck. The Drones are kept near the playing area for use and reuse throughout the game. On Attack, Drones may be paired up with enemy ships and satellites. They're particularly useful as inferior Scouts (a Drone sees only the unit with which it is paired) because they are so expendable. On Defense, Drones may stand alone around the Sphere as additional ships or they may Screen. Screening: To screen, a Drone is placed on top of a defending piece (no more than one per). A screening Drone must be destroyed by enemy fire before the ship or satellite beneath it can become a target (it is important to screen your carriers). However, the ship being screened by the Drone may not return fire at an attacking ship unless its screen is destroyed (thus it is possible that both the screening Drone, which then gets destroyed, and the ship being screened, may both fire at the attacker). Drones are returned to the reusable Drone pile after the battle is over. |
|
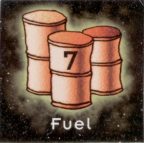
FUEL: (28 assorted values) Fuel counters are kept in a player's hand (the rack) until they are used. On Attack: One fuel is required to move a ship to another Player's Sphere (this pays for the round trip) and once there, another Fuel is required for that ship to fire its laser weapon. There is no "change". If you play more fuel counters than you need in a turn, the extra is lost. You may play additional Fuel from your hand as you need it during a battle. Fuel from all sources (Fuel Counters, Planets, Tankers, etc.) is cumulative for the entire turn. EXAMPLE: Joe has two planets and plays a fuel counter worth 7. This gives him 9 Fuel... enough to move and fire 4 ships in the first round of combat. If he penetrates the defender's Sphere, he has 1 Fuel left for one shot to attempt to capture a planet. On Defense: The defending player must expend 1 point of fuel for each ship that wishes to return laser fire in battle. The defender may rely on his planets (1 Fuel each), play a Fuel counter(s) from his hand, or reveal a Fuel source from his face down defending ships & satellites. |
|
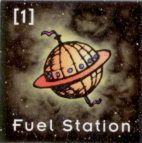
FUEL STATION: (1) This orbiting station provides unlimited Fuel. On Attack: The Station will provide all feul necessary to move ships to attack an opponant's Sphere. However, it may not provide fuel for firing weapons in another player's Sphere unless it is towed into battle by a Tug. Since the combination has no firepower, it would be adviseable for it to lurk in the safety of the "rear". On Defense: The defending player may reveal his Fuel Station to provide any fuel necessary to return fire. |

|
HALLEY'S COMET: (1) Keep this event in your hand (the rack) until you need it. This cosmological event causes such a stir that all attackers must return to their home Sphere for further orders. This is only usable by the defender. Play this after the attacker has declared his attack and paid his Fuel to move to your Sphere... but before any combat. The attacking player's turn is over. |
|
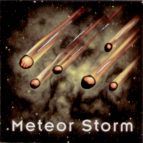
METEOR STORM: (2) Keep this event in your hand (the rack) until you need it. This is only usable by the defender. Play this after the attacker has declared his attack and paid his Fuel to move to your Sphere... but before any combat (and before the attacker rolls for Carrier Drones). The attacker rolls a die for each attacking ship (including Planet Busters). If the result is an even number, she ship may continue with the attack. If the result is an odd number, the ship must return to its home Sphere immediately. Meteor Storm is discarded after use. |
|
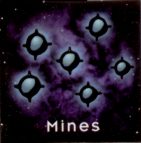
MINES: (2 - Advanced Game) These are melded (face down) around your Sphere of Influence as though they were a ship or satellite. They never leave the Sphere. Any attacking ship (or Planet Buster) must test for their effect, before laser fire begins but after all ships have been paired up for laser combat. The attacking player rolls a die three times. If any result was an odd number, the ship (or Planet Buster) is destroyed. Mines are discarded after they have been encountered. Mines are not affected by Chaff or the force field from a Screen Satellite. |
|
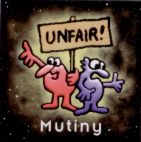
MUTINY: (2) Keep this event in your hand (the rack) until you need it. Angry hotheads attempt to take over the enemy ship of your choice during a battle. On Attack: Once all ships have been paired up and the defender has had an opportunity to spend Fuel. Choose the enemy ship, satellite, or Colony that you wish to take over. On Defense: Play after the attacker has declared his attack and paid his Fuel to move to your Sphere... but before any combat. Choose the enemy ship that you wish to take over. To resolve the Mutiny, roll a die. If the result is an even number the Mutiny fails. If the result is an odd number the enemy ship immediately leaves its former fleet and hides out in a safe place until after the current space battle. When all combat is over, it goes to the Sphere of its new owner. |
|
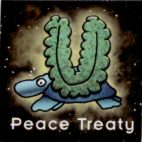
PEACE TREATY: (1) Remove this piece from the deck before play. It is used to start the discard pile. When the draw deck has been exhausted, mix up all the discards (including the Peace Treaty) and put them back in the cloth bag (if you are useing it). The game ends the moment any player draws the Peace Treaty (that player may, of course finish his draw). The player who drew the treaty may meld any planets he is holding and then the game is over. Players count their scores. Planets are worth their values... colonies are worth 1 point each. High score wins the game. |
|
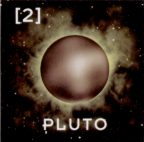
PLANETS: (9) The nine planets of the Solar System have values ranging from 1 to 9. This number is the victory point value of the planet, as well as its defense value in laser combat. A planet may not be attacked until the defender has no ships or satellites surrounding his Sphere. Only one planet may be captured by a player on his turn. Any number of planets may be destroyed by Planet Busters on a turn. Planet Bonus: When you meld a planet into the middle of your Sphere from your hand (the rack), you immediatly draw two addional pieces from the draw deck (you do not get extra draws for capturing a planet from another player). Each planet in your Sphere provides 1 fuel. On attack, this fuel may only be used to send ships to another player's Sphere... it may not be used to fire lasers once there (although this reduces the amount of fuel used from a Fuel conter that you play). On Defense, each planet allows one defending ship or satellite to fire its laser. |
|
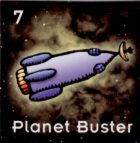
PLANET BUSTERS: (5) Keep these in your hand (the rack) until you use them. Planet Bustersare special self-contained solid fuel robotic attack units (value from 3 to 7). They may only be used during an attack and require no Fuel. They may attack alone, or along with your fleet, in which case you place them face up on the table with your attacking fleet. Planet Busters may be turned back by Halley's Comet or Meteor Storm, or destroyed by sabotage... but they are not subject to Mutiny as there's no crew aboard. A planet buster turned back by a comet or storm is discarded. A Planet Buster must be paired up against a defending ship or satellite (if there are any) and survive fire (if any) before it can attack a planet. Planet Busters have no lasers and cannot shoot at ships or satellites (we probably should have put an asterisk behind its battle number). If it survives defensive fire, a Planet Buster is free to attack a planet. If you have more than one, you may attack different planets. A Planet Buster paired against a colony will attempt to destroy the colony. Whether it succeeds or fails in this effort, it blows up and is discarded. Planet buster attacks on planets occur AFTER any attempts to capture a Planet. The battle number on a Planet Buster is compared against the value of the planet which it attacks and combat is resolved as in ship-to-ship combat. If the Planet Buster scores a hit, the planet is destroyed (discard it). Once a Planet Buster makes its attack (win or lose) it is destroyed by it's own explosives (discard it). |
|
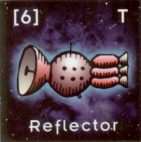
REFLECTOR: (1 - Advanced Game) This ship carrys a giant parabolic dish with which it reflects all lasers that are fire in its direction. A ship which fires its laser at a Reflector also fires at itself. The reflector can be destroyed by laser fire as it has a defensive value of [6]. One die roll determines the fate of he firing ship and the Reflector. Most ships that would destroy the Reflector will end up destroying themselves as well. EXAMPLE: A Scout is firing on a Reflector. The Scout's Battle Number is 5 less than that of the Reflector, so it can only destroy the reflector on a roll of a 1. It will, however be destroyed by its own reflected beam if it rolls a 5 or less. |

|
REVOLT: (2) Keep this event in your hand (the rack) until you need it. Your 5th column has fomented a rebellion on the enemy planet of your choice. Only usable by the attacking player, prior tolaunching an attack. Roll a die. If the result is an even number, the Reolvt fails (discard the event). If the result is an odd number, the Revolt succeeds... Place the Revolt marker on top of the Planet. After all combat in your turn is over, discard the Revolt tile and place the new planet in your Sphere of Influence. A Revolt is considered part of your attack phase. You may not play a Revolt on one player and then attack another. However, you may also just play a Revolt and make no further attack. This is the only way you could possibly take more than one planet from a player in a turn: the first one by Revolt, the second thru planetary combat. |
|
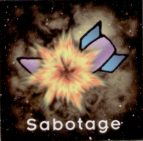
SABOTAGE: (2) Keep this event in your hand (the rack) until you need it. Your agents have slipped into the opponent's fleet and will try to destroy the enemy ship of your choice. On Attack: Once all ships have been paired up and the defender has had an opportunity to spend Fuel. Choose the enemy ship, satellite, or Colony that you wish to Sabotage. On Defense: Play after the attacker has declared his attack and paid his Fuel to move to your Sphere... but before any combat. Choose the enemy ship that you wish to Sabotage. To resolve Sabotage, roll a die. If the result is an even number the Sabotage fails. If the result is an odd number the enemy ship is immediately Destroyed (discarded). Discard the Sabotage after it has been used. |
|
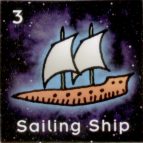
SAILING SHIP: (4 - Advanced Game) These highly prized vessels use solar sails to gather energy and do not require Fuel to move or fire. However, their lower speed makes them easy targets for other ships. Whan anything but another Sailing Ship fires a laser at a Sailing Ship, the Sailing Ship does not get to return fire unless it survives the fire of the other ship. |
|
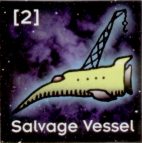
SALVAGE VESSEL: (2 - Advanced Game) These magnificent units do yeoman work for space fleets. They have no attack value (and should lurk in the "rear" on attack) but they more than earn their keep. When a Salvage Vessel is present at a space combat, do not throw casualties immediately into the discard pile. Keep destroyed ships in a convenient location until the combat is over. If a Salvage Vessel survives the battle, its owner may take any one ship that was destroyed in the recent combat and add it to the ships in his Sphere. If opposing Salvage Vessels remain after combat and they both want to claim the same wreck, the players dice for the prize. High roll gets the salvaged ship, the loser goes home empty. This isn't in the rules but makes sense. A Salvage Vessel is a super Tug. You may, if you wish, use a Salvage Vessel as a tug to tow a satellite to an attack. Once there, if you wish to salvage a battle casualty, you must leave your tow behind. |
|
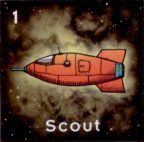
SCOUT: (9) The Moonwerk Scout is an older combat vessel with sophhisticated scanning tecnology. Scouts are the only ships which may perform scouting missions. On Attack: Always uses your scouts first when pairing ships up against defenders. When a Scout is paired up against a face-down enemy ship, the enemy ship or satellite and both of the adjacent ships (on either side of that enemy ship) must be turned face up. If a ship revealed in this manner is not otherwise attacked during combat, it may return defensive fire at the Scout (the Scout may only fire at the ship or satellite against which it was paired). Scouts are very useful in finding holes through which Planet Busters may pass (like tugs). |
|
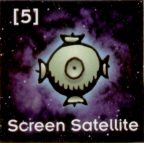
SCREEN SATELLITE: (2 - Advanced Game) This satellite creates a strong force field around a player's Sphere. The force field is only in effect if the Screen Satellite is face up. The owning playe may choose to keep this piece face up, ensuring that it will function, or he may keep it face down to provide an attacker with a rude suprise if it should be revealed by an attacking ship. You may not choose to reveal a face down Screen Satellite if the attacker failed to reveal it. When the Screen Satellite is face up, the force field is in effect and No LASER FIRE is allowed to pass through. The force field has no effect on torpedoes so torpedo attacks may still occur. How to defeat it:An attacker may pair up attacks against other targets at the same time as he attacks the Screen Satellite. Only the ship (or ships) paired against the Screen Satellite may fire at the Screen Satellite. Remember, an attacker may not double up against a defender until at least one ship is paired against all other defenders. If the Screen Satellite is destroyed, all other attacks may then be made. If not, laser combat is over, and all Fuel allocated for that combat is wasted. Planet Busters penetrate the force field of a Screen Satellite, but once inside, are subjecct to defensive fire (if they are paired up against something that can fire lasers). |
|
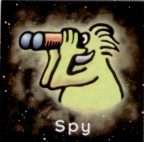
SPY: (2) Keep this event in your hand (the rack) until you need it. The Spy is only usable on your turn, prior to an attack (you may choose not to attack once you see what he reveals). To get his report on the enemy fleet, roll a 10-sided die. The result is the number of your opponent's tiles which you may turn face up before going in to attack. Any anemy ships or satellites revealed by the Spy that are not attacked are turned face down before the combat begins (you might not want to pair a ship up against a Screen Satellite revealed by your spy). |
|
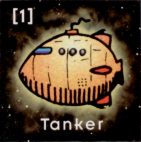
TANKER: (1) This huge, slow moving space ship provides unlimited Fuel. On Attack: The Tanker will provide all feul necessary to move your ships to attack and provide all fuel for firing your weapons in another player's Sphere. Since it has no firepower, it would be adviseable for the Tanker to lurk in the safety of the "rear". On Defense: The defending player may reveal a Tanker to provide any fuel necessary to return fire. |
|
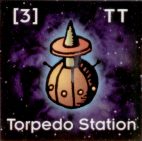
TORPEDO STATION: (2 - Advanced Game) Satellites with two torpedos but no laser capability. They cannot move unless towed to an attack by a Tug. |
|
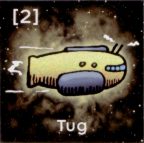
TUG: (2) Useful fleet Tugs are able to tow a satellite to a space battle in another Sphere. One Tug may tow one satellite (Colonies are too large to tow). While together, the Tug and its tow are treated as though they were one ship. They use one Fuel when moving or firing (if any) and are considered to be one target in combat. To determine the defensive combat value of a Tug and tow, total their battle numbers and divide by two (round fractions up). If the Tug and tow are hit in combat, their owner must roll a die to determine which is destroyed. If the result is an even number, the tow is destroyed, and the Tug may return to its owners Sphere after combat (if it survives torpedo fire). If the result is an odd number the Tug is destroyed. If the Tug is destroyed, the tow is captured by the defending player and may be turned face down and melded around his Sphere after the attacker returns home. |
|
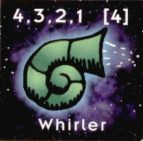
WHIRLER: (2 - Advanced Game) Found on the surface of Pluto, Whirlers are deadly combat vessels. It requires only one Fuel to move and one fuel to fire its weapons. However, it makes multiple attacks (roll the die 4 times). The decreasing numbers indicate the Battle numbers under which these attacks are made. The Whirler may only fire at ships whith which it has been paired. At all times, the Whirler has a defensive value of [4]. |
|
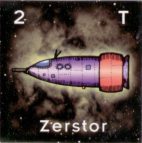
ZERSTOR: (9) A fast unarmored fighting ship with potent lasers and a torpedo launcher. |
Go back to Tom Wham's Games & Books
Go to Tom Wham's home page
This page updated March 26, 2005